Skip to content
Uncomplicate.
  • Instagram
  • Facebook
  • Pinterest
  • Twitter
  • About Me
  • Search Icon

Uncomplicate.

in pursuit of a simpler, more sustainable creative life.

Garden Hack: Plastic Tubs as Mini-Greenhouses

Garden Hack: Plastic Tubs as Mini-Greenhouses

May 9, 2021 Beth Comments 0 Comment

This gardening hack is something I started doing way back in my much more complicated life. For 14 years my business year started and ended in May: my Art Licensing contracts pretty much all came from and led to exhibiting at Surtex, an annual tradeshow for the Surface Design industry. My focus and obsession for months leading up to the show was booth displays, handouts, portfolios full of new art. Must. Have. All. The. Art. Springtime, instead of a time for planning and planting my garden like I’d done all those years before, was my annual mad-scramble to finish all the extra last-minute stuff I decided I had to have done. I rarely took days off anyway back in those years, but spring was the worst of all when it came to any kind of self-care or real-life stuff.

All the local annual plant sales as well as prime planting time in my area happened anywhere from 2 weeks before I left to the week I was in NY for the show. After I got home, I’d hit the ground running with show follow-up, sending out samples, and starting newly requested projects. By the time I was ready to come up for air long enough to think about planting my little vegetable garden, most garden centers only had a few sad, dry, leggy starts stuffed into a back corner – if that. I might get plants at a discount this way but my beloved garden had become an afterthought and I hated that.

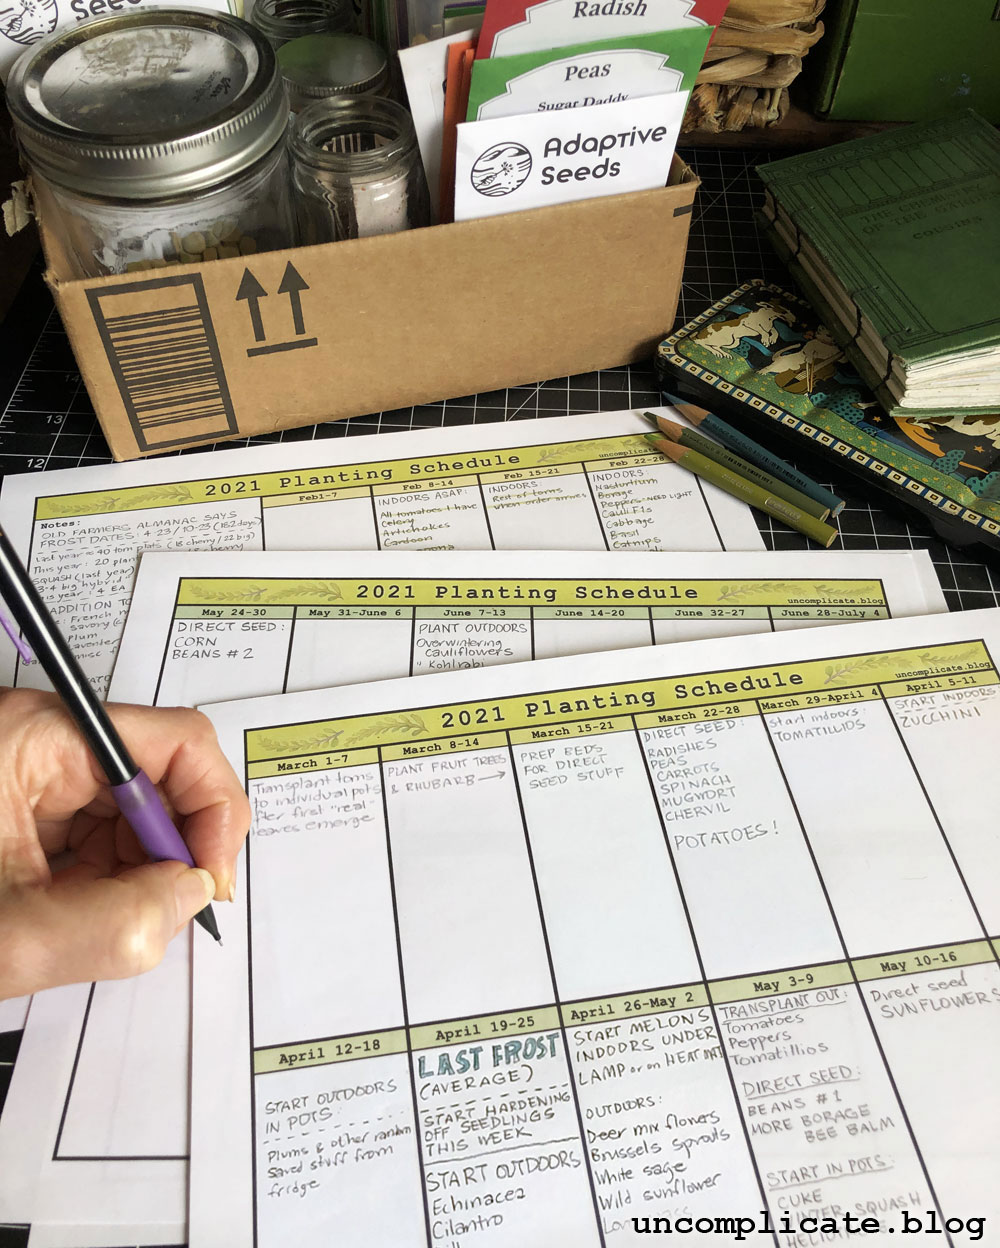
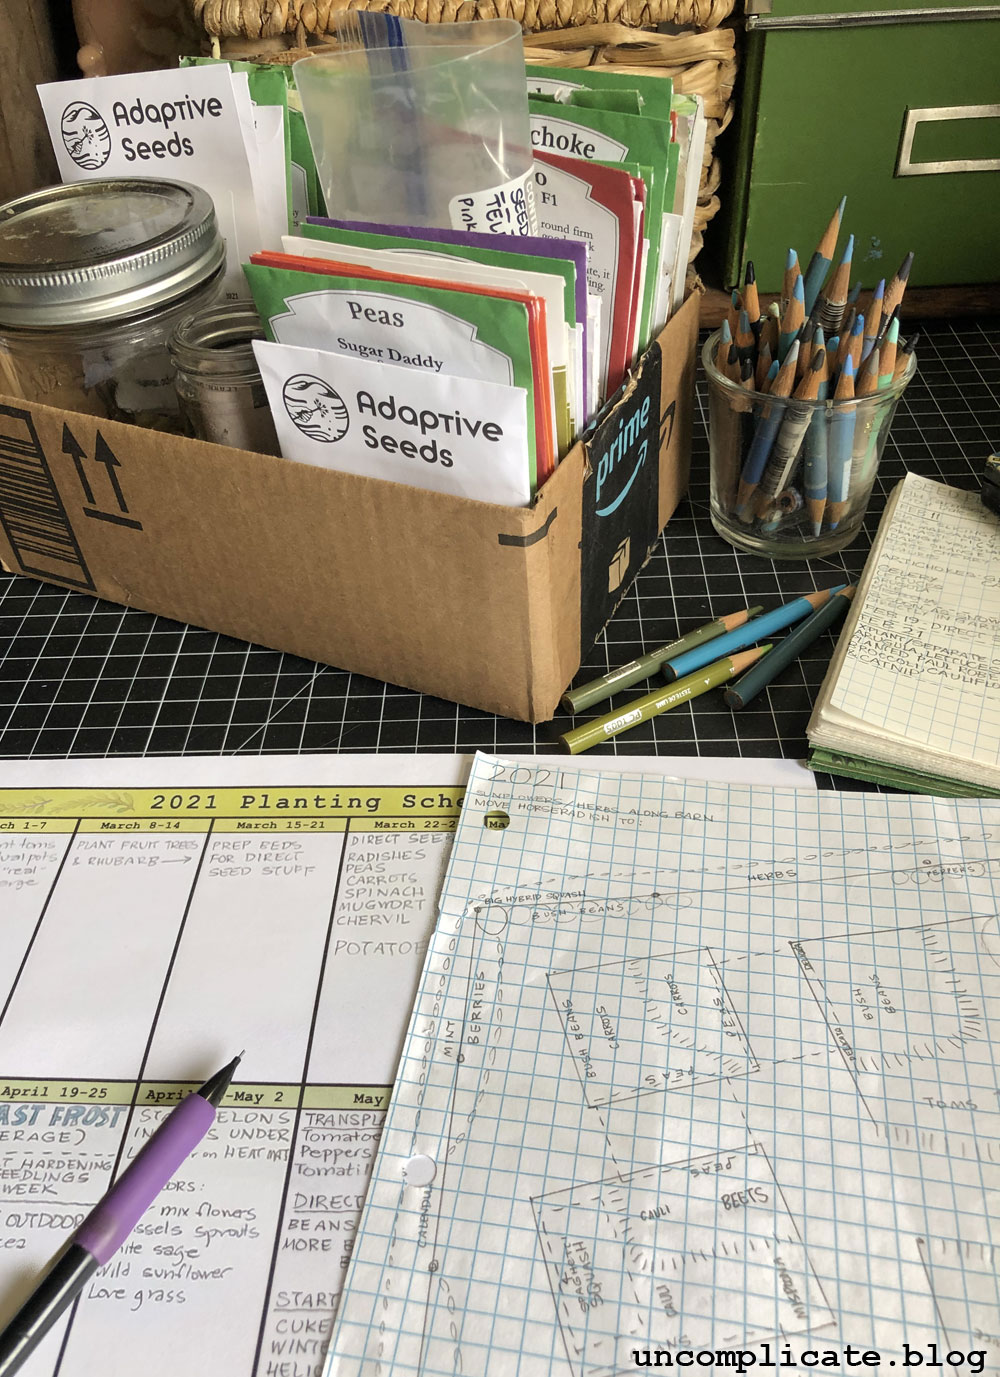
After way too many years of this I finally decided I needed a compromise and a way to grow what I wanted around my busy work schedule. I started going to my favorite plant sale the first weekend of May with no spare moments to actually do anything but keep the little plants safe and healthy as possible until I got home later in the month. Doing this meant I’d be forced to take a day off as soon as I got back to plant them. An actual day off. This was me taking baby steps toward a healthier less-complicated life – gotta start somewhere, right?

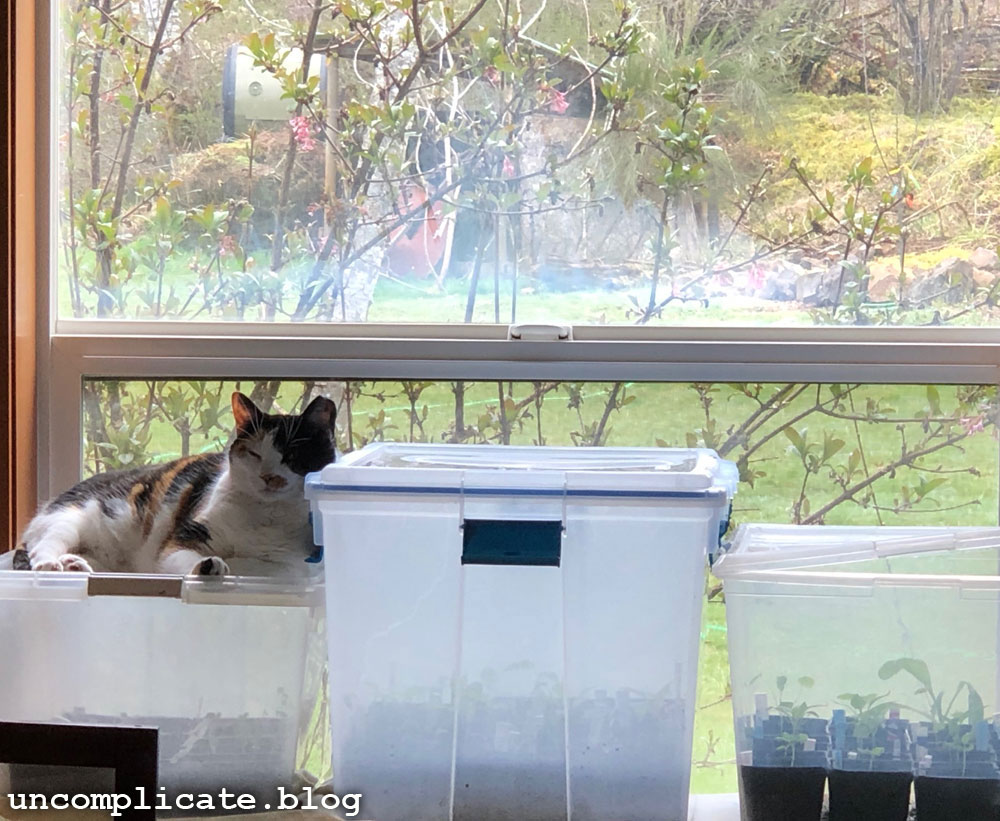
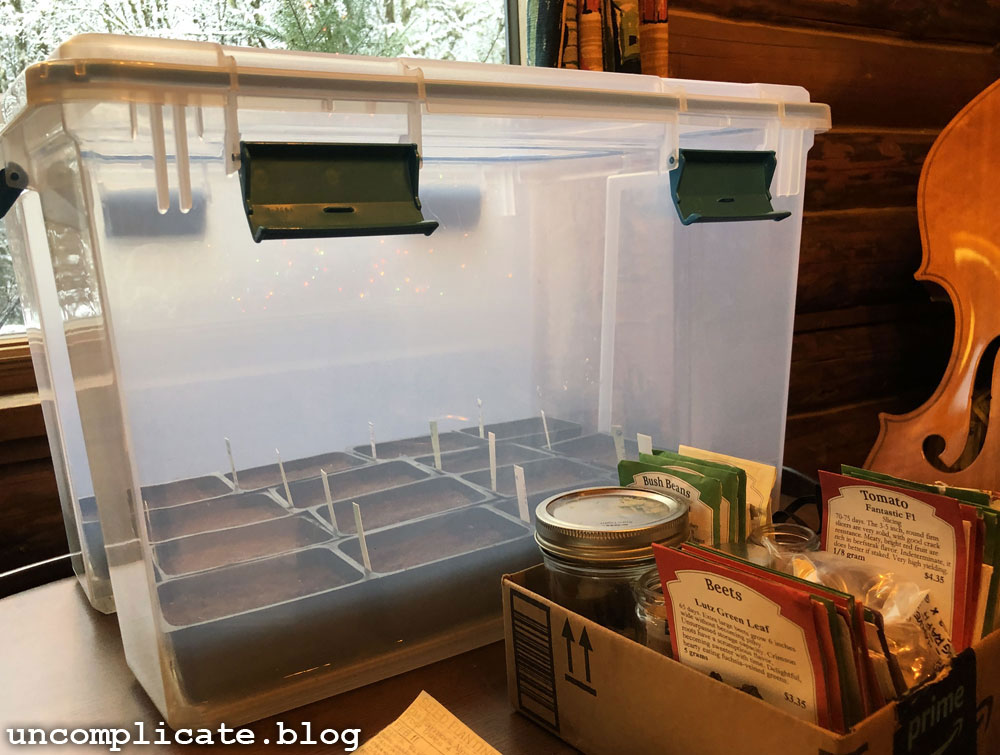
I needed a setup that was simple for me during a stressful & busy time and something my house-sitter could deal with fairly easily the week I was gone, so I bought some clear plastic storage tubs with clear lids to keep them in for those few weeks. The tubs were large enough the seedlings could fit inside with the lid closed to stack in my tiny living room by the front door at night, then move out to the porch during the daytime for fresh air and sunlight. This became an easy way to harden them off slowly to be ready for planting a few weeks later.

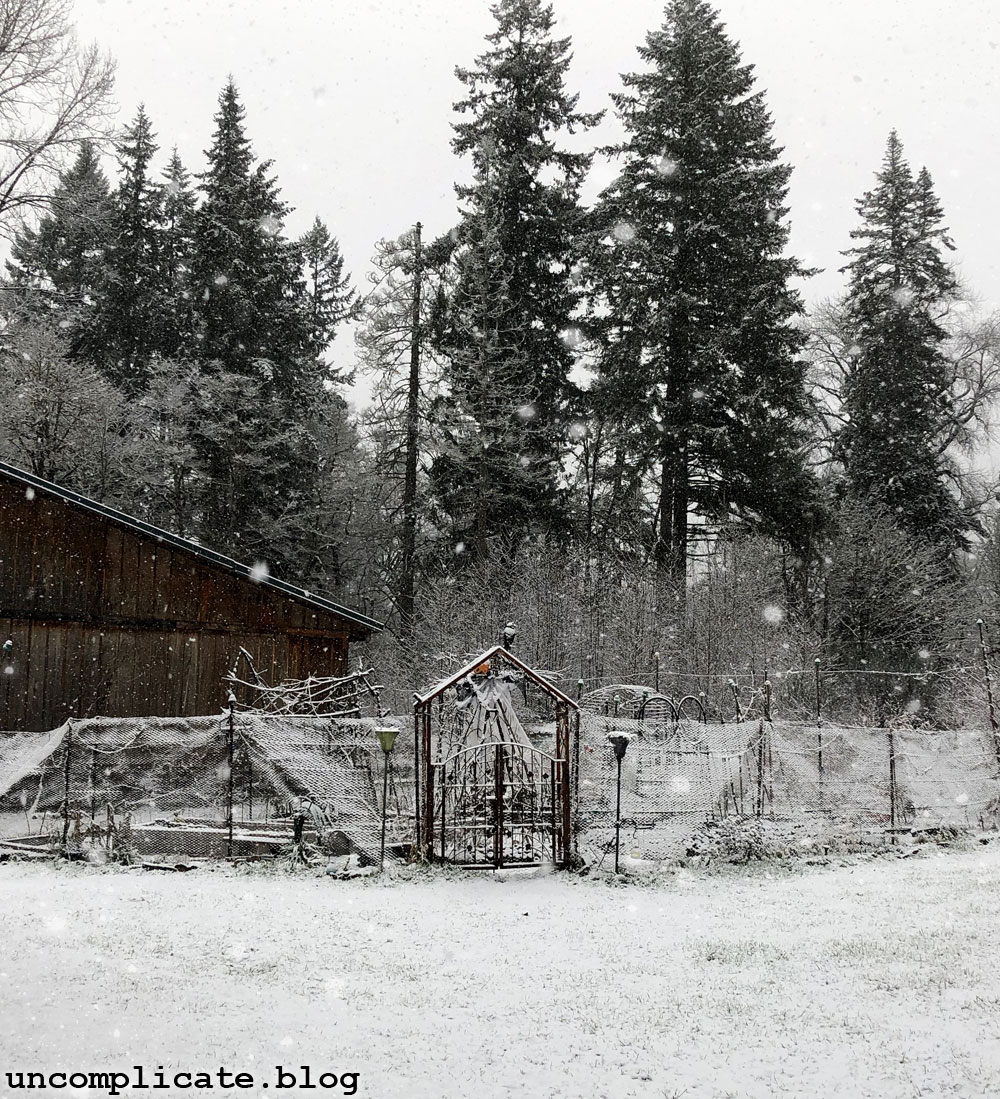
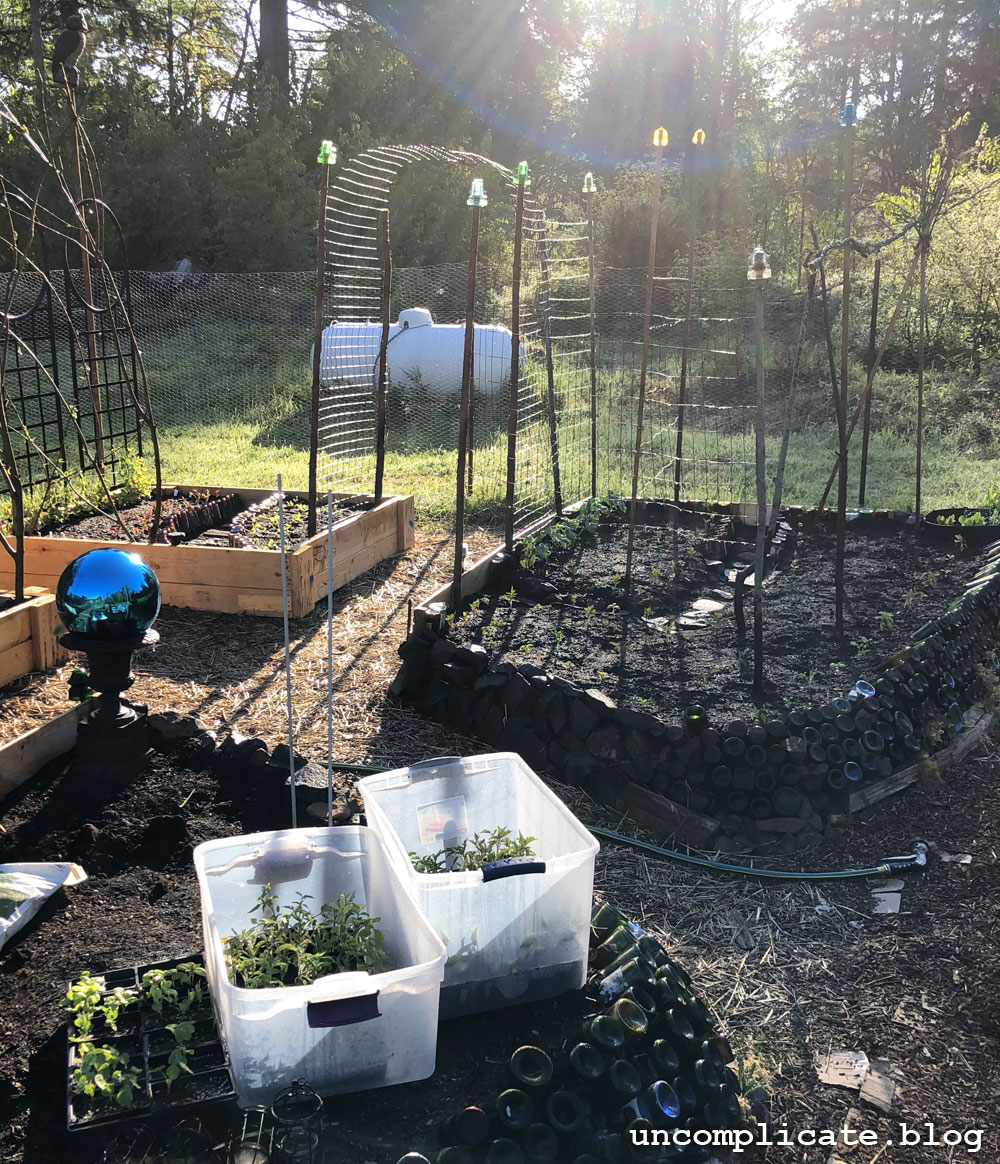
Fast-forward what feels like a thousand years to my new life and my bigger garden, where I’m back to starting everything from seed: my plastic tub method has been a great way to manage seedlings until I get a proper greenhouse (someday!).

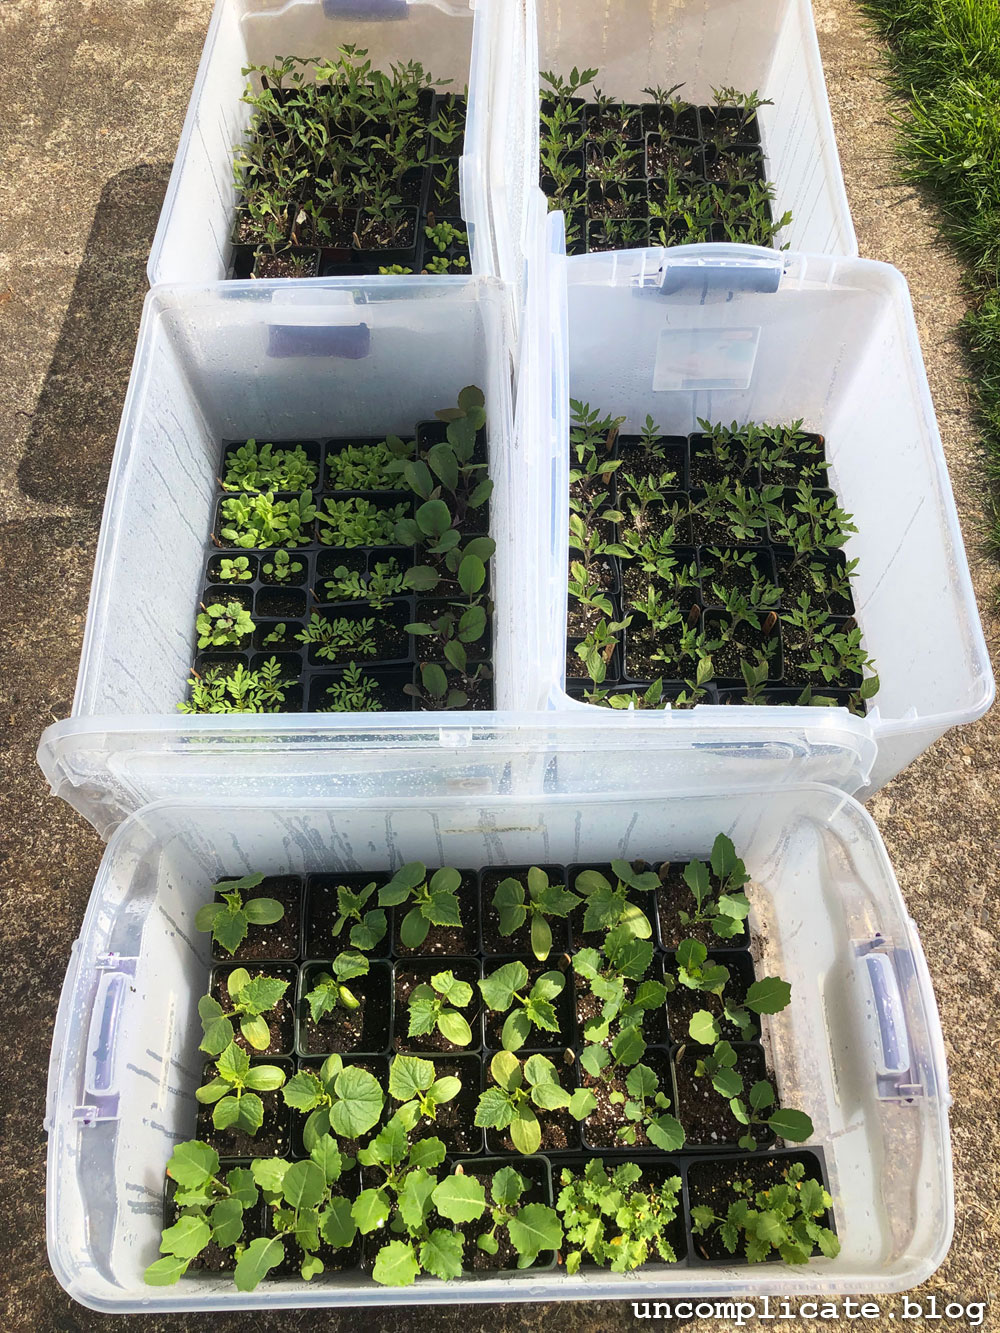
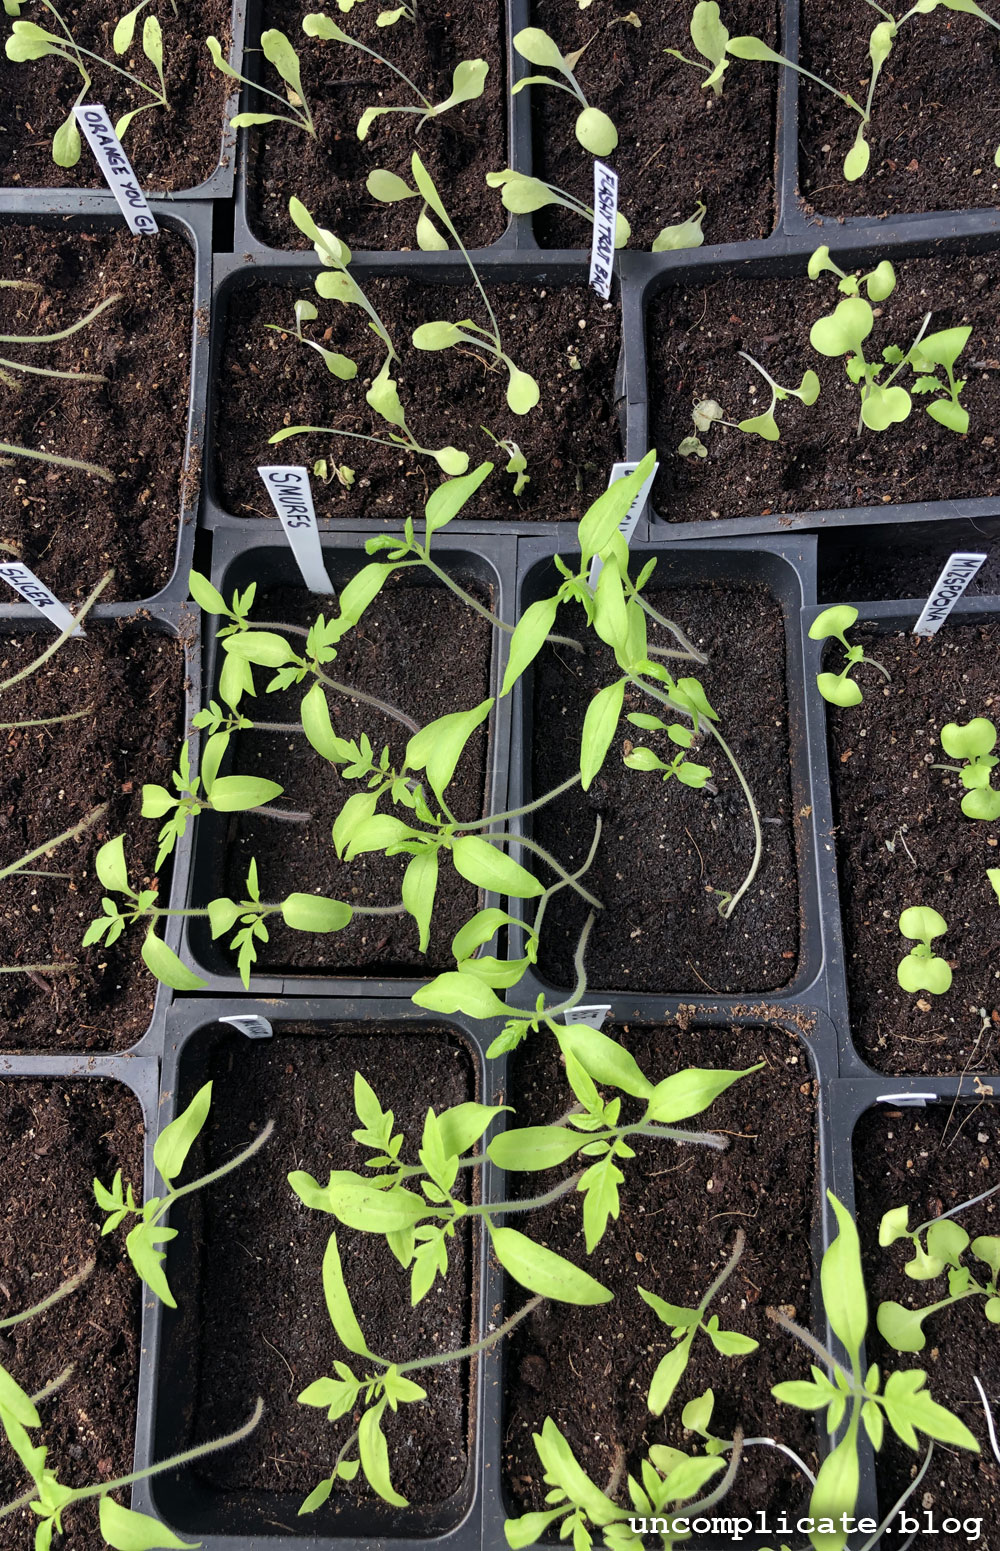
They’re like mini-greenhouses early in the season, and portable cold-frames when it gets closer to planting time.

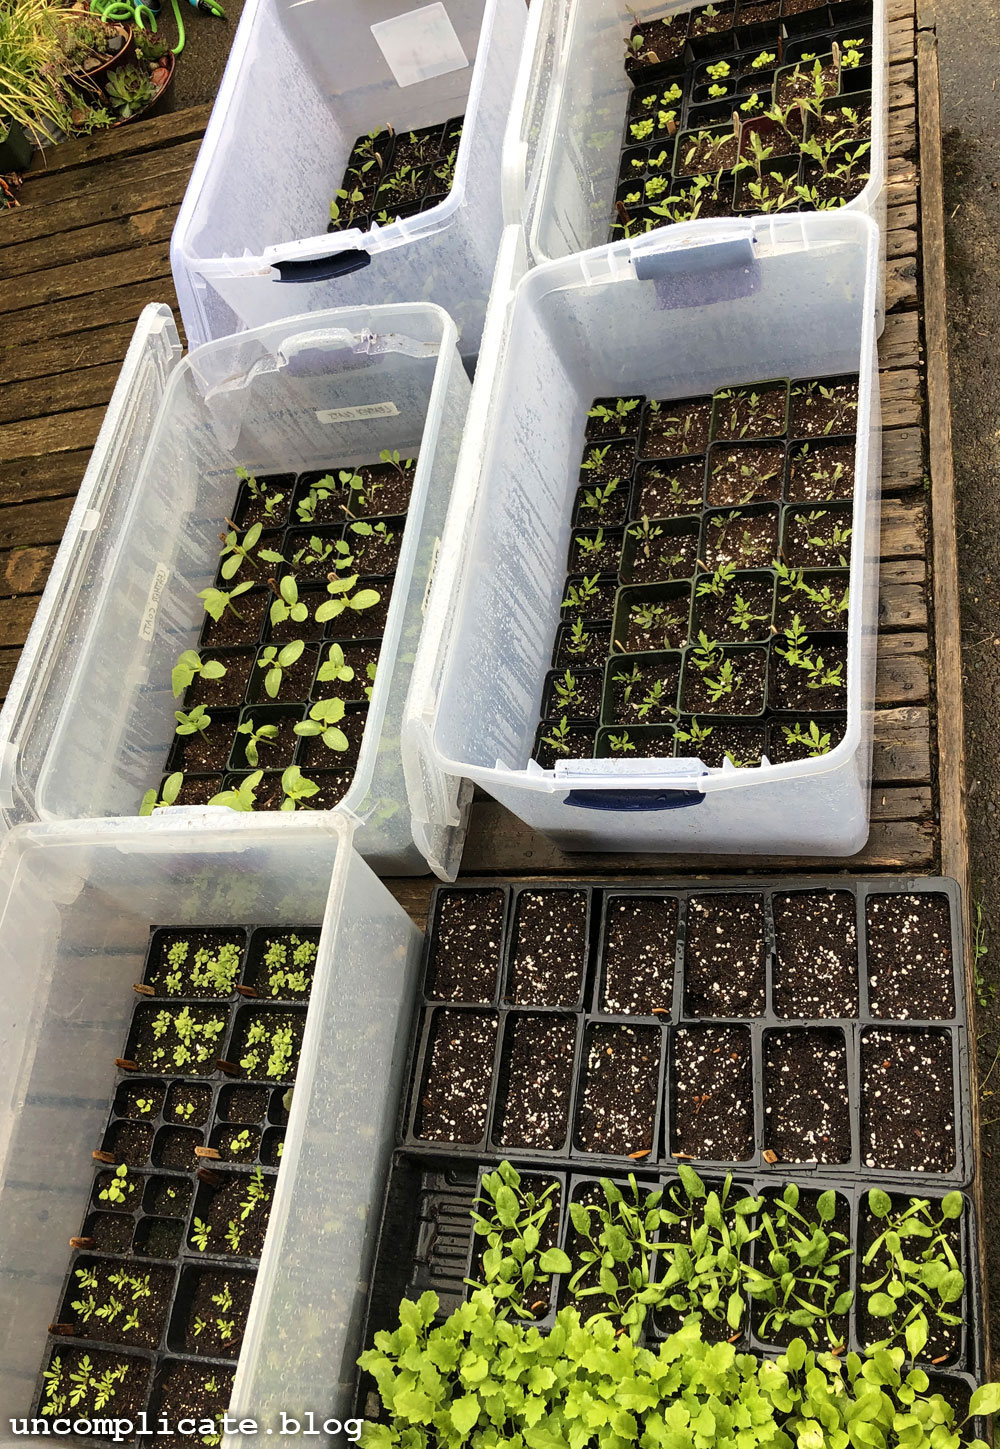
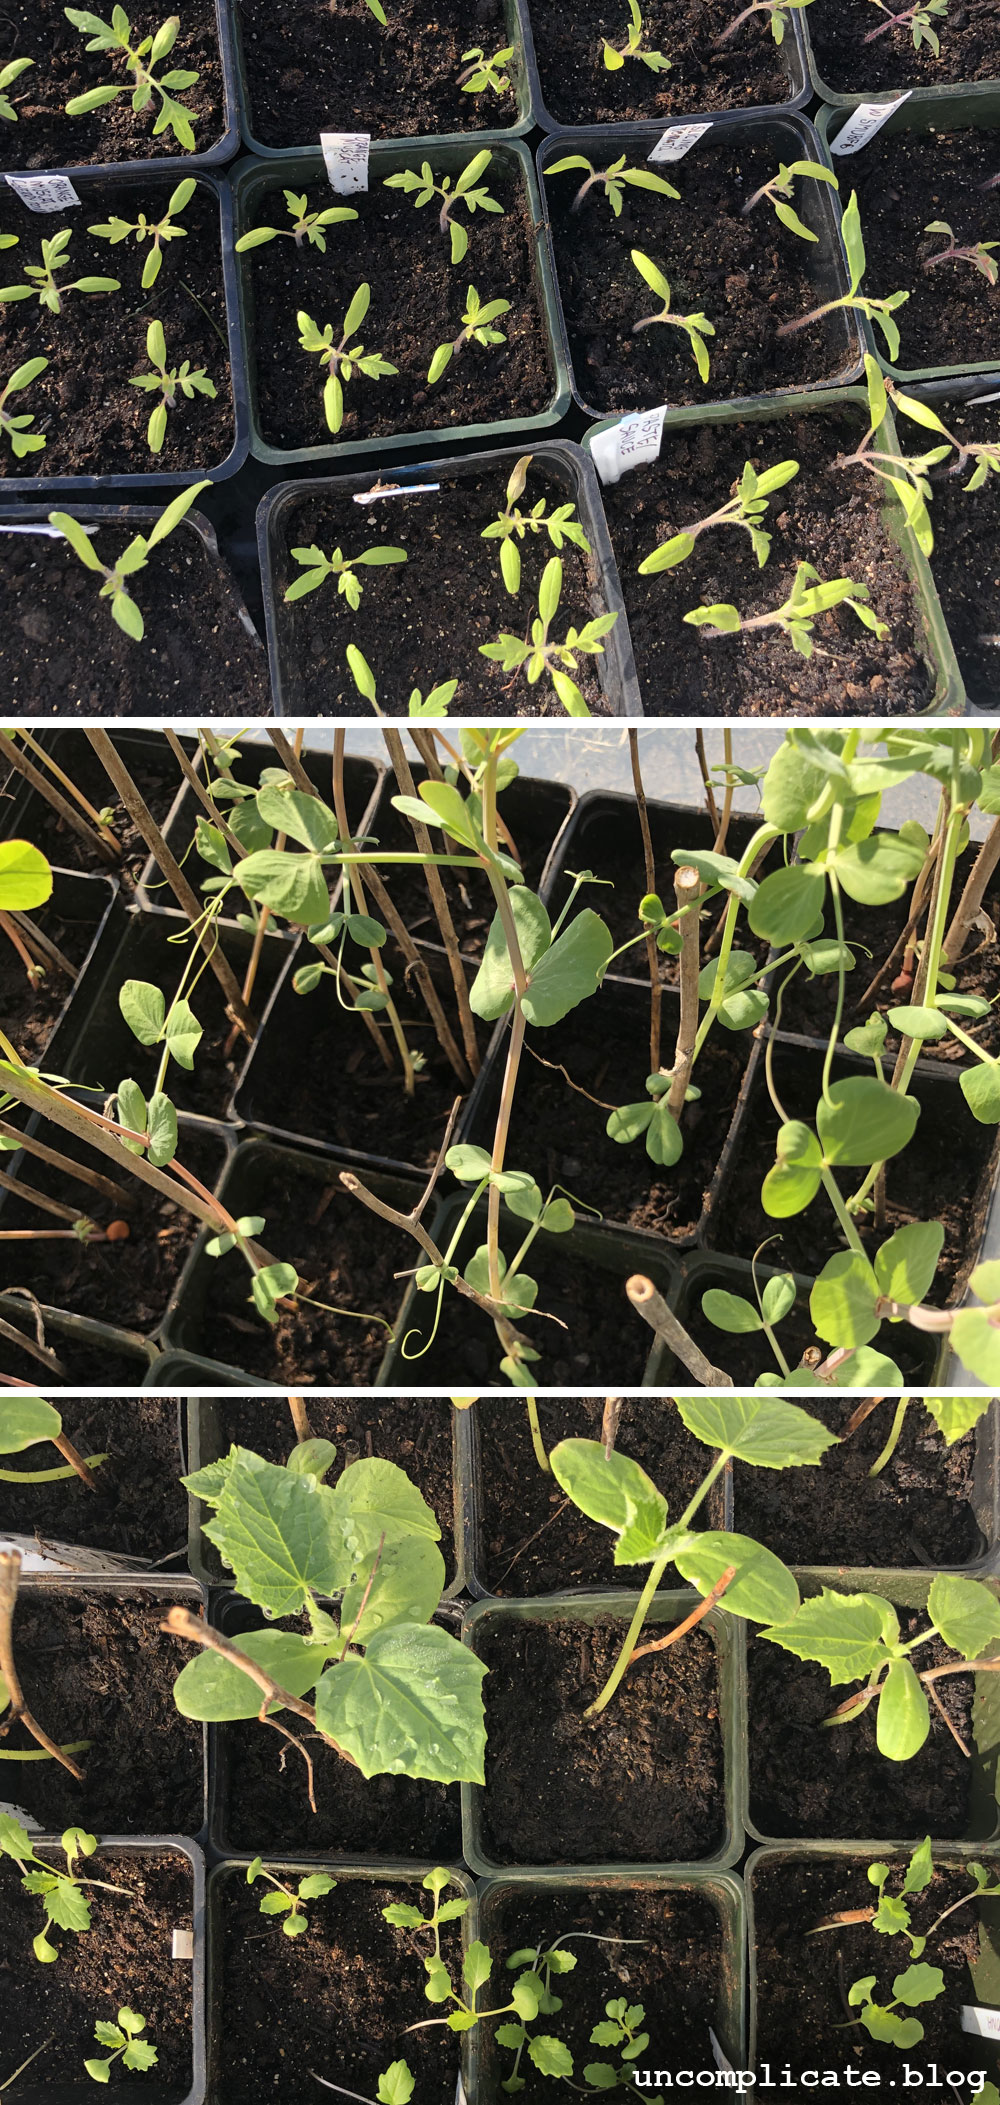
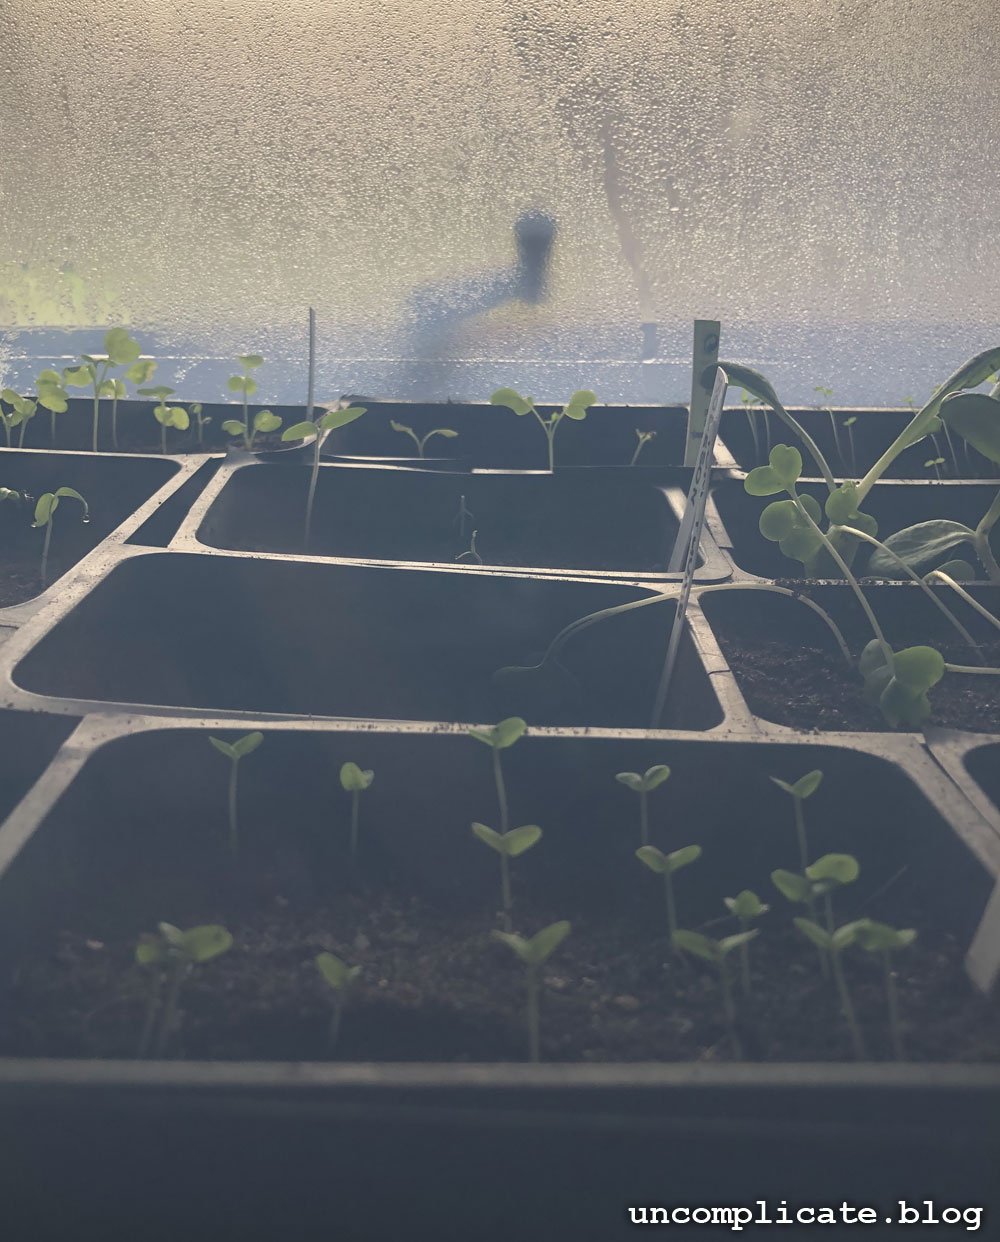
When the seeds are first planted, the tubs can get moved around, taking turns between warm windows and the couple heat mats and grow lights I have inside. With the lids closed, it provides a nice humid little space for them to germinate.

planting tomato seeds on a snowy February day
cat-proofing indoor tubs with stuff I have on hand

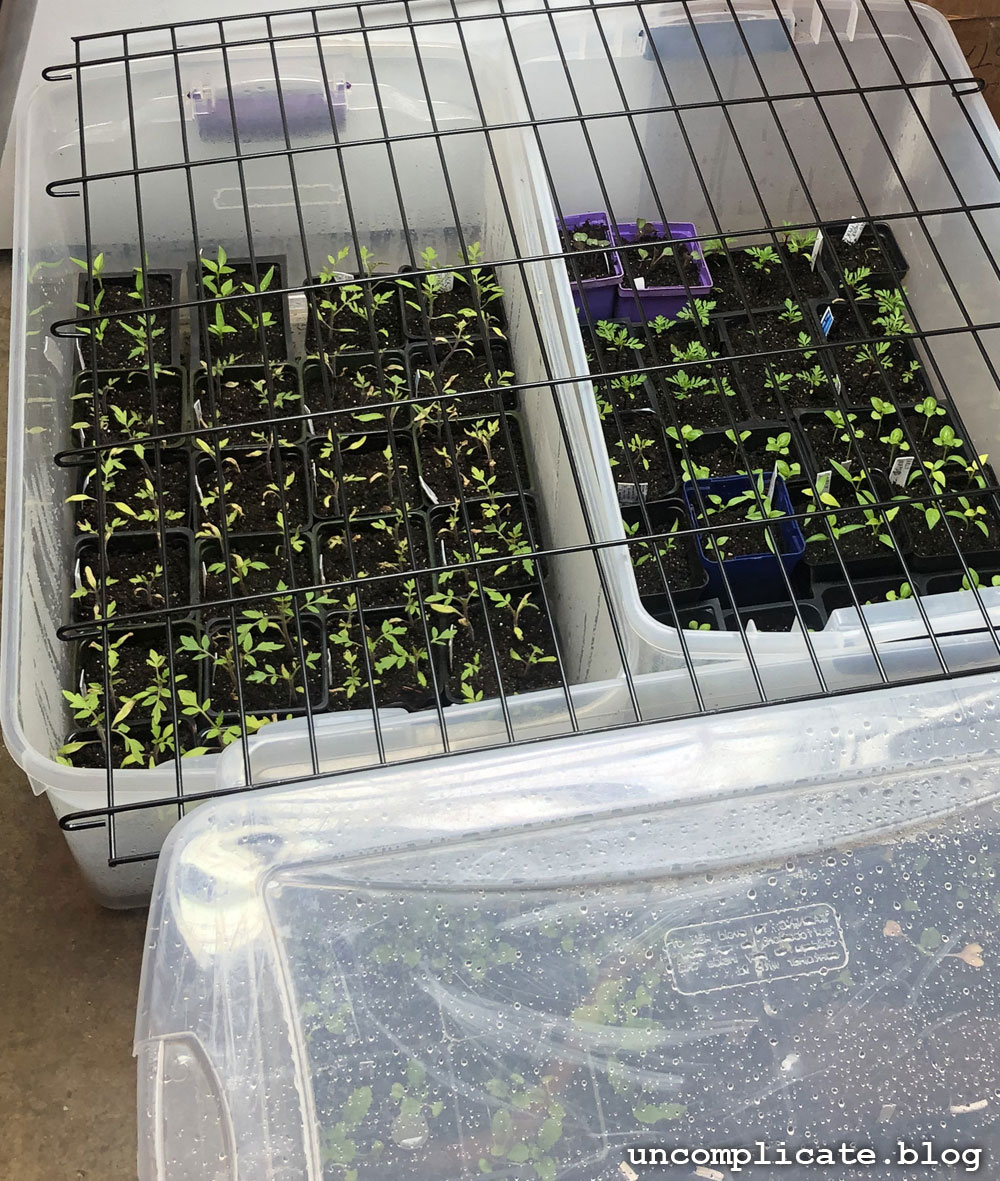
When it starts getting warm enough during the day, I can start transitioning them outside to the patio with the lids on or off depending on weather. Good air flow is important for these tender little babies, but spring weather can be a little harsh: hard rain or direct sunlight on those rare hot early spring days can sometimes be too much, and their leaves may get sunburned. Leaving the lids on, propped up with a stick (or whatever else is handy) works great for protecting them while still letting in sunlight and air.

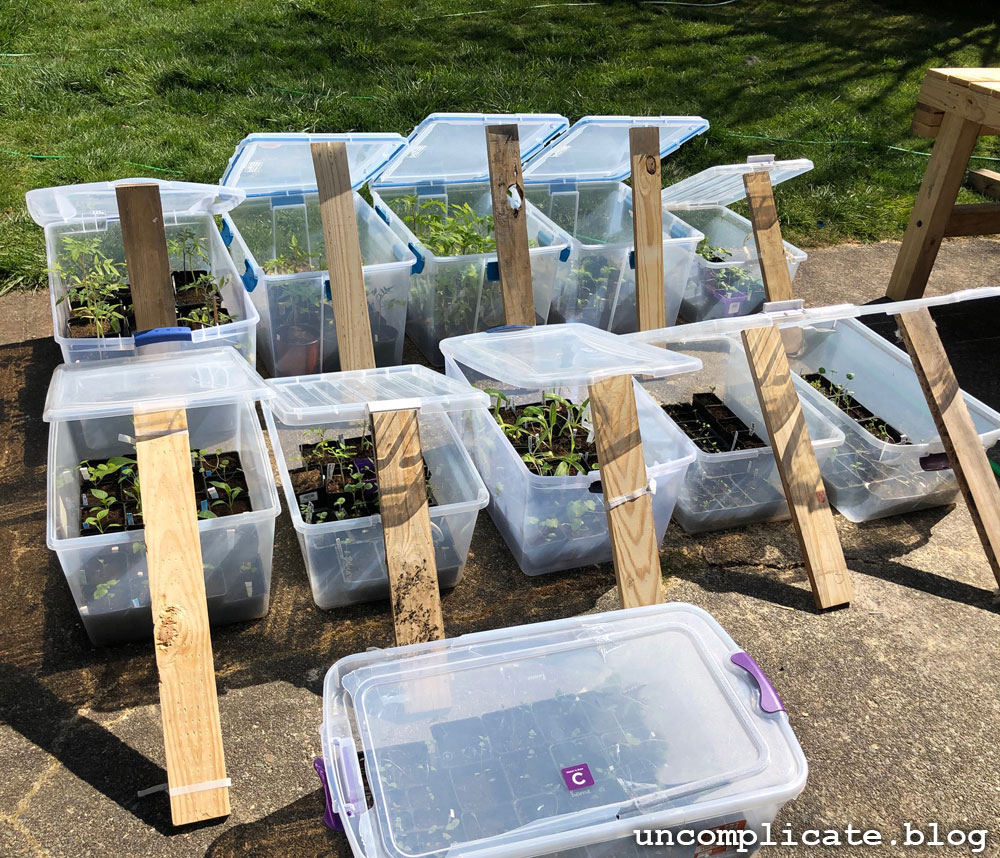
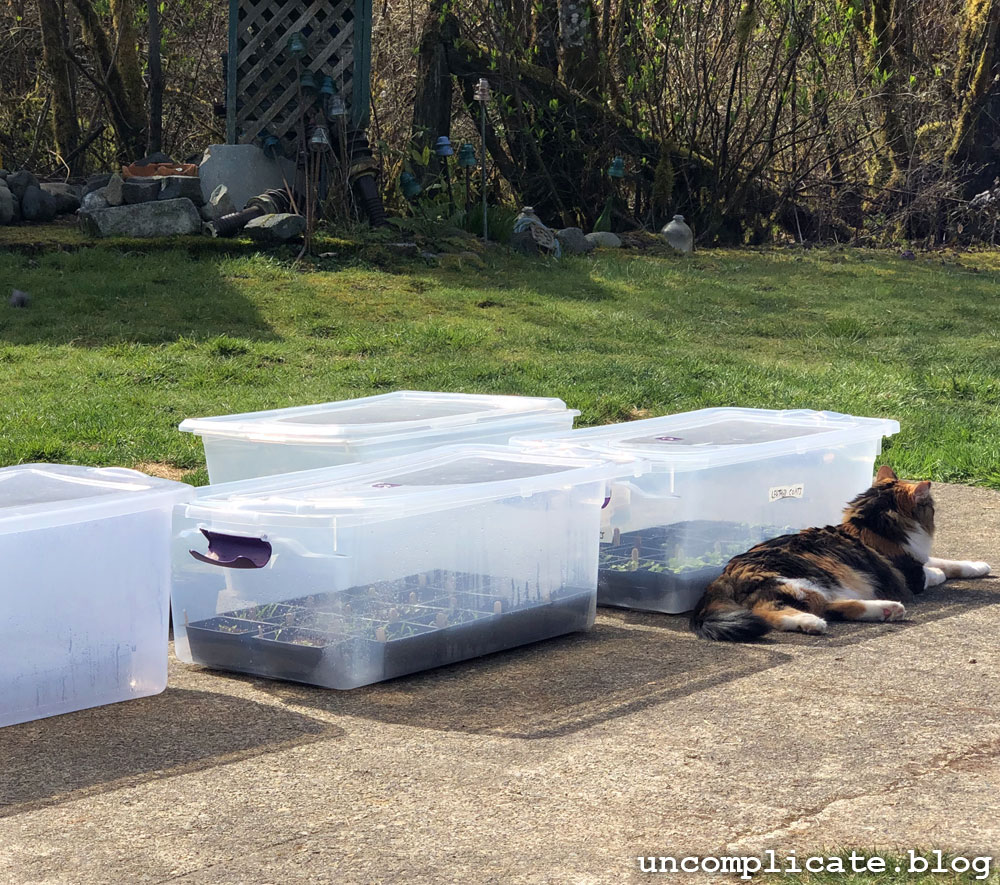
Then, late in the day while they’re still warm from the afternoon sun, I’ll lid them up and bring them inside for the night, stacking the bins in a safe place until morning. As their final planting day gets closer, I start leaving them out during the day without a lid overhead for protection, and to harden them off to outside temperatures I’ll usually leave them outside for a few nights first with lids on and then without, before planting them in the garden.

When it’s finally time to plant, I can just carry the tubs out to the garden. Easy peasy.

I haven’t done this yet, but turning a tub upside down over tender direct-seeded starts could provide extra early-season protection from cold, or even emergency-coverage in hard rain or hail. Clear plastic tubs for the win, right?

Someday I’ll have a real greenhouse, but until then, my plastic tub method has been an excellent way to keep my babies safe and healthy from the time the seeds are planted until they’re moved into their beds.

The Veggie Garden: Scheduling Plantings

The Veggie Garden: Scheduling Plantings

March 2, 2021 Beth Comments 0 Comment

So, you’ve decided what to grow, you’ve gotten your seeds and are ready to go. Now what?

Last year I procrastinated starting my seeds for so long (motivation-killing global pandemic and all, we all had our own versions of this, right?) when I finally started planting I just threw everything I had into little pots on the same day and hoped for the best.

seedlings mid-April 2020

Most new things I’d planned to plant either weren’t available (because 2020) and I’ll admit I didn’t make the best choices for alternative vendors when my favorite sources were closed for quarantine, so a lot was delayed even further. But again, not rocket science, right? Plants grow. It all worked out.

Moving forward though, I wanted to be a little more organized and really utilize the seasons and this space to their potential. Or rather, start learning how to do that.

It started with organizing my saved and purchased seeds. After being totally intimidated by that fancy alphabetized drawer system I saw on Instagram last month I started to brainstorm about how I should organize mine: alphabetizing and color-coordinating stuff is kind of my thing but what made more sense for me is to file them in order of when I’ll be planting them. I checked each packet’s instructions (sometimes this is in the seed catalog or I might have details noted in my little garden journal) and started laying out little stacked packets by planting date until my table looked like I was playing a game of Solitaire, and realized this could all make more sense with some kind of spreadsheet or calendar.

The Virgo in me is all about lists and schedules and charts, but the word “spreadsheet” seems to bring on a spontaneous eye-twitch so I drew it out by hand instead of using actual software meant for stuff like that. I’m weird that way.

I double-checked my average last-frost date online and marked it on my calendar and counted backwards from that for the number of weeks before that date it was recommended to plant, noting which things to start indoors and which to direct sow in the garden.

I find it helpful to see the weeks spread out visually this way: somehow anything, even the passing of time, seems more real if I can just look at a picture or chart.

So far this has really helped me figure this all out. My seeds may not appear more organized in their same little old cardboard box but they’re all lined up in order of planting dates. After planting something, the packet or jar just goes to the back of the box behind those I haven’t yet planted.

So far so good.

tomatoes and greens from the first planting 2 weeks ago
teeny tiny basil (& friends) planted last week

If you’d like to use my planting calendar to fill-in your own gardening schedule, I’ve tidied it up and saved it as a PDF you can download here for free and print out yourself. It’s organized into two pages of pre-dated 12-week schedules (starting with this week!) and a third page left blank so you can fill in your own dates and start any time or keep using it for late-summer and fall planting. If you’re not sure of your own average frost dates, you can find them here on the Old Farmer’s Almanac website (US and Canada).

Of course weather isn’t guaranteed so exact dates for hardening off and transplanting out will probably change as we get closer, but it helps to have a general idea. I mean, who hasn’t had to run outside in a mad frenzy trying to salvage tiny seedlings they transplanted the day before from a freak hailstorm or random foot of April snow, right?

If you download and use this Planting Schedule, please let me know how it works for you! I’d love to hear your feedback and some of your own organizing and scheduling ideas. I realize there are a lot of more involved and detailed garden planners out there, but I kind of like a simpler approach that gives me more control over the details. Maybe some of you out there are like me, and hopefully you find this template useful.

The Veggie Garden: What Should You Grow?

The Veggie Garden: What Should You Grow?

February 19, 2021 Beth Comments 0 Comment

It’ll be here before we know it: garden season!

This year I’ve noticed a shift in how I’m planning the garden. Back in my shady little city garden I was successful and satisfied to eat backyard salads during the summer months, maybe have enough berries to bake something once or twice during the summer. Aside from my usual short-season tomatoes, scattered herbs and greens, I might splurge on a plant or variety that sounded fun or different.

midsummer dinner

The first season in a larger space I guess I did that same thing but on a larger scale. Then last year I started planting things I buy more often, or have trouble finding now that I no longer live a couple blocks from Whole Foods or my old favorite co-op.

baby purple Brussels sprouts in June

I realized I had been buying a spaghetti squash every week or two from the grocery store or farmer’s market. So I planted a ton of spaghetti squash. We started harvesting and eating them in July when my big, sturdy (!) squash arch started to bend and break under the weight of dozens of squash, and here in February we’re still enjoying them weekly but there are about a gazillion still out in the garage . . . so, ok, there’s a lesson learned.

just one squash harvest in mid-September

Same thing with the tomatoes. I thought I could never have enough tomatoes, and I have literally a freezer full of tomato puree (so fortunate to have lots of freezer space here).

the last pea harvest in July

I grew a second crop of peas in the fall but didn’t get many from it. I had been freezing shelled peas all summer but I ran out mid-winter and I’ve been back to buying bags of frozen peas on my monthly shopping trips. I was giddy to have grown my very first crop of potatoes last summer and had a good couple baskets stored away in the fall, but I’ve been back to store-bought potatoes again. Note to self: grow more peas and potatoes. Right?

my first potatoes (and green tomato photobomb)

Why haven’t I been growing my own cabbage for homemade sauerkraut? I’m still buying grocery store celery: I should be growing that. Dry beans, more string beans, more carrots. I end up buying all of that stuff eventually. We eat a lot of homemade soup during the colder months so I should be growing more of my usual soup ingredients. So many things could occupy some of that space left when growing a few less tomatoes and squash, right?

To me, this feels like some new amazing concept (!) but I realize it’s just Beginners Gardening and Homesteading 101: Day 1 Stuff, right? But many of us seasoned gardeners have never really grown this way: thinking like a homesteader or farmer. We’ve basically been grocery shoppers who grow a few extra things because we like them, or they’re fun to grow. It’s a definite shift in thinking for many of us and a key step toward living more sustainably.

We’ve been conditioned to survive as consumers, depending on others for our most basic needs: we run out of something in the pantry or fridge, we get in our car and drive to the store and pick it up. This was totally my life back in the city. Several times a week. I used the excuse that my house was tiny and I didn’t have room to keep stuff on hand, plus there were multiple grocery stores and restaurants within a couple blocks. Honestly though, it was just easier to not have to think about stuff until I needed it.

Quarantines and closures this past year forced all of us to rethink the way we shop and eat to some extent, but even as restrictions loosen and life gets back to “normal” we have the opportunity to change our habits for the better.

Growing more of your own groceries doesn’t have to be rocket science.

patio containers
goodies from the patio

Even if you have limited space for growing or storing year-round, you can become a lot more practical about how you’re using your space by thinking about your garden this way. What do you buy a lot of that you could actually grow yourself? Chances are you can fit some of that into existing garden beds or a few more pots on your patio, and extend its usability by utilizing shelves in a cool corner of your garage or basement or even the space in the back of the freezer where that old bottle of vodka is pretending to be a woolly mammoth buried behind a giant ledge of frost.

And along the way, you’ll learn what you could use more (or less) of and what crops are really worth your time, energy and space.

It’s time to get planning what you’d really like to grow now. What do you buy and eat a lot of that you could be growing? What would be awesome to have in your freezer or pantry next winter? Buy those seeds or make your lists for the spring plant sales in your area.

Start small or go big, either way it’s going to be an amazing year!

Starting from Seed: Planning and Buying Seeds

Starting from Seed: Planning and Buying Seeds

February 11, 2021 Beth Comments 0 Comment

It’s that time of year again: time for buying garden seeds and planning what and where we’ll grow it all. This is that endless-possibilities time, the hopeful, looking-forward time: winter won’t last forever and this year will be better than ever, right?

The last few years, January and February slipped by super fast with a lot of mumbling to myself about how I really need to get going and order/plant seeds. Yeah. I need to get on that. Like, yesterday. You know how that goes. Then suddenly, like 2 months have swished by and there’s a global pandemic and you can’t buy anything from anyone in a reasonable time frame and all your motivation has been sucked out into the void and… Yeah. We all had our versions of that last year, right?

This year I really felt like I had my shit together (I should know better whenever I start to think that). It was still January when I finally sat down to pour through my seed catalogs and plan the garden, but by the time I was ready to place my orders, one of my favorite seed houses had already put new orders “on hold until we catch up with the first round” setting that order back at least a couple weeks, maybe a month. The company that was still taking orders had already sold out of a few of the key items I had been hoping for. What? I’m already late?

Ok. Deep breath. It’s still just the beginning of February, I’m still ahead of the curve, right? It’s all good.

After my first order arrived I sat down with my little garden journal and coffee can of saved seed packets, once again feeling pretty smug about how organized and on time I’m being with all this. I’ve got this all under control: I should write a blog post! Yeah, that’s it. Because, look how on top of it all I am? This inspiration should be shared with the world.

But before I started, I took a break and peeked at Instagram, where the first post on my feed was a local homesteader’s photo of her gorgeously super-organized seed-filing system, categorized and alphabetized in a clear plastic bin of neatly labeled drawers. People had been commenting on her post about their own super-organized systems and the cool gardeners who had inspired them, and I just sat here looking kind of like that little emoji with the straight line mouth. Or maybe the one with no mouth at all. Leave it to social media to completely zap creativity and self-esteem, right? I put down my phone and switched gears to business admin stuff and housework while my little coffee can of seeds and empty garden map sat untouched on my desk for a few more days.

Here’s the thing: there will always be folks who have more beautiful or organized or spacious gardens or homesteads than us. Who know more than us. Bloggers who make it look easier or more romantic. The important thing is we keep moving forward, keep trying, keep learning.

Each year we have the opportunity to build on what we learned the year before, and that’s awesome. Three years in, I still say stuff to myself like “I can’t call myself a homesteader, I still don’t even have chickens.” But I keep learning and improving what I’m already doing. I’ll get there.

So, we’re going to call that photo above a “before” shot of my garden and seed organization system. I’m probably not ever going to have that flawless alphabetized drawer system I saw, but I’ll invent something along the way that works for me and my space, and hopefully I’ll share some ideas you’ll find inspiring and useful for your own seeds.

When it comes to seeds, I prefer to purchase locally grown: it just makes sense that a grower from your own area can provide something that will do well in your garden and will have growing advice specific to your climate. Here in the Pacific Northwest, my most recent favorite sources have been Adaptive Seeds & Territorial Seeds (this is NOT a paid endorsement, I just really like what both companies have to offer). Seed Saver’s Exchange has always been a great source for heirloom varieties, and here in my town, our local Naturopathic Health Center just started a seed-swap for local gardeners. A quick internet search should turn up some great sources in your own areas, from seed growing companies to Facebook groups for gardeners and farmers: a wealth of information right at your fingertips.

Next I’ll dive a little deeper into planning the garden and scheduling plantings, but for now: if you’re not already way ahead of me, there’s still time to get going and pull out your saved seeds and/or buy new ones. Let’s do this!

It may look like this out there right now, but spring is coming! What do you want to grow this year?


Listening to Nature

Listening to Nature

January 11, 2021 Beth Comments 0 Comment

Last summer we started carving paths through the brush and trees to more easily enjoy different areas around our little homestead.

One of these little paths has a stairway over a rocky hill (actually it’s old railroad ballast: just big rocks piled on more rocks filled in with little rocks) and when I finished the stairway in late-summer, I transplanted a little fern that had been growing in the center of the path. It was the hottest driest part of the year so I hauled buckets of water to the little guy daily, but by mid-fall I was sad to see it seemed to have not made the transition and was completely brown and shriveled (you can see its little brown fronds hanging over the stairs in the very center of this photo).

Last month I walked back up and over the little hill for the first time in a while, and was greeted by a gazillion little baby ferns sprouting on the other side of the hump where there had only been rocks, dirt and a little moss before.

In the middle of what we usually think of as the greyest and deadest part of the year, fresh little green stuff is busy filling in every possible crack in the woods.

All these tiny woodland babies just celebrating the return of the wettest season made me smile, and reminded me Nature has it all under control.

I’ve been growing and gardening my whole life, most of that time spent in a more urban environment. I built little areas and planted stuff and pulled out the weeds. I mean, that’s what you do, right? I spent almost half a century obsessively studying gardening books and pouring through gardening magazines for fun. I felt like I kind of knew a lot about growing stuff.

Living out here where I’ve spent most of my days from spring through fall working outdoors, I realize how much more I’ve learned about growing in these 3 short years than all those other years put together. The plants and the land tell me what’s up: what they need, what they like, where they should be. It’s taken me a while to realize this was happening, to actually listen to what Nature is trying to teach me. It makes me even more excited to get back outside and work together with this place to create more useful yet sustainable spaces for producing food and simply enjoying.

This concept isn’t exclusive to living in the country, this is just where I finally slowed down enough to actually listen and learn. Nature shows us what’s up in a crack in the sidewalk if we take the time to look and listen. Uncomplicating the way we interact with Nature is key, and I’m still learning how to do that.

Tomato Season: Extended Dance Version

Tomato Season: Extended Dance Version

January 8, 2021 Beth Comments 0 Comment

Ok so maybe there’s not any dancing (sorry/not-sorry) but it was definitely extended as long as possible.

My old city-garden was heavily tomato-centric due to limited time and space. I grew other stuff but my main focus was always the one thing that is so superior to its store-bought version, my favorite food: fresh tomatoes. Once again I brought my old habits with me to my new space and I’m still learning to let them go. I used to say “there’s no such thing as too many tomatoes” but I may have learned my lesson this year.

Or not.

I got a way-too-late start on my tomatoes this year. Most normal gardeners are wrapping up in early October but my tomato plants were just hitting their peak: I was literally popping cherry tomatoes in my mouth all day long and we were feasting on Caprese salads for dinner almost every night. It was kind of heaven.

My October garden was chaotic, messy, and prolific. But when several days of hard-frost were predicted by the 3rd week, it was time to think about extending the growing season indoors.

I’ve had good luck in the past ripening end-of-season tomatoes in paper bags loosely folded shut: the bag allows some air flow, and the ethylene gas they release is trapped in the bag and causes them to ripen more quickly. Check them daily for soft spots or mold which will spread quickly to the rest of the fruit in the bag leaving you with a yucky wet mess.

I needed a new system to keep track of this many tomatoes. I wanted the fruit to get whatever nutrients and moisture they could from their vines, so for 2 days straight I harvested 2-3′ long vines, tying them together in bundles and hanging them from sloppy makeshift nails and wires in my kitchen.

The vines dried out within a couple days but the fruit continued to ripen slowly for another month. As the vines dried they shrunk a lot. I’d bundled a few with rubber bands but most were held together with twine and wire, which I had to scramble to tighten after the vines dried out to keep them from slipping out of their bundles.

Even after the vines were dried up, they benefited from the air flow and I didn’t lose too many to rot or mold. Every few days I’d roast or freeze another small batch, and had to stay on top of that because once they ripened they would soften way faster than summer tomatoes.

As the weeks passed they became less flavorful, but they were still far superior to grocery store tomatoes.

By November 20th they were done, and so was I.

We savored the last fresh tasty one and I processed and froze the last batch.


I never really counted how many quart bags of fresh, roasted, and smoked tomatoes I ended up with, but every time I go get a bag out of the freezer I feel sort of rich. I love how easy the bags are: they thaw super fast and are so easy to add to a dish.

I’m starting to plan this year’s garden and am trying hard to focus on a little more diversity and – yes – a few less tomatoes. What are you excited about growing this year?

Super Easy Mason Jar Sauerkraut

Super Easy Mason Jar Sauerkraut

October 13, 2020 Beth Comments 1 comment

This is another one of those things that when I finally did it, I wondered what had taken me so long. You guys, homemade sauerkraut so easy and so good. Like most things, I overthought it for too many years: I need to buy special equipment like a crock or something. I should buy a recipe book and learn more. I’m scared of fermenting food in my kitchen. What if I do something wrong?

Yeah, yeah, yeah. All of the above may be valid but are mostly just dumb excuses for not doing something that will make you happy (if you’re a kraut and pickle fan like I am!).

If you have cabbage, salt, a clean jar and something to weigh the cabbage down with (this could be a smaller jar with marbles in it, a clean nonporous food-safe paperweight, or a proper fermentation weight) and a reasonably cool spot to store the jar (I use a corner of my garage floor) you’re all set.

By now we’ve all heard about the gut-health benefits of eating more lacto-fermented foods, and for a minor time-investment (pretty much just 15 minutes chopping and squishing, then being patient for 3 days to a couple weeks) you can get a jar of fermented goodness that’s just as (or more) delicious than that pricey artisan kraut with the cute label you buy at your favorite fancy grocery store. Lacto-fermentation may be science, but it’s not rocket science. You really should try this!

I eat kind of a lot of it, but I’m the only kraut-fan in my house (I know, weird, right?) so I’ve been making it one small to medium head of cabbage at a time, in a quart size mason jar (or a few smaller jars). I love the flavor of caraway seeds so I usually just make basic/traditional kraut with that as my only extra seasoning, but I’ve really enjoyed kraut with garlic, peppers, even spring nettle added – this is something you can get creative with!

(Scroll down for the printable recipe/instructions)

SUPER SIMPLE MASON-JAR SAUERKRAUT

1 small to medium head of cabbage

1 to 1-1/2 tablespoons salt

1 tablespoon caraway seed (optional)

Quart jar with lid

Glass fermentation weights, clean non-porous food-safe paperweights, or a small jar filled with marbles or clean stones

Start with super-clean supplies and work area: I sterilize my jars and weights with boiling water, and make sure my hands/gloves are freshly washed too.

Wash cabbage well and peel off any soft or limp leaves from the outer layers as well as any damaged spots. Halve or quarter the head and remove the tough inner core. Thinly slice section by section and place in a large bowl.

Sprinkle salt over the cabbage and start to massage and squeeze it with your hands (I like wearing surgical gloves for this kind of thing). This is where the magic starts to happen! In 5-10 minutes, the cabbage turns from crispy-crunchy-coleslaw to juicy-translucent-kraut. I was really amazed at how much juice I squeezed out during this process the first time I made it.

Add your caraway seeds or other seasonings/extras now, and continue to mix it up completely, continuing to massage it a bit more.

Scoop it into your jar (or jars) with a measuring cup or large spoon, pressing it down as you go. Leave at least 1/2 inch or more head-room at the top of the jar. You’re going to want room for your weight(s) and it does “expand” as it bubbles and ferments.

Add your weight(s) and press down firmly, making sure the cabbage is all below the surface of the liquid. The cabbage wants to float (!) but it’s important that it stay covered to avoid mold and ensure proper fermentation.

I bought glass fermentation weights here (sponsored link) and have been really happy with how well they work.

Remove any floaters or bits clinging to the sides or rim of the jar that are exposed to air. Cover the jar (not too tightly, as gases will release during the fermentation process). If you use a second smaller jar as your weight, you can cover the whole contraption with a cheesecloth or tea towel secured to the big jar with a rubber band. Again: not rocket science.

Place your jar in a cool, dark location. I like to set my jars on a plate or tray with a paper towel on it, to catch any possible liquid that seeps out when it bubbles and ferments.

Now the magic really starts. This isn’t as scary or intimidating as it might seem to us nervous overthinkers. You just need a little patience and common sense, that’s all. Check your jar(s) every couple days for leakage or small bits of mold on the surface caused by exposed/floating pieces of cabbage (if you’re careful this probably won’t happen, but if it does, don’t be alarmed: scoop them off and let the rest keep doing its thing). Don’t be scared of bubbles or fizzing, this is the beneficial bacteria doing what they do! Change out the paper towel and wipe down the jar if it does overflow, to avoid odd smells or mold on the outside of the jar or surrounding area.

During the entire process it should look and smell cabbagey and pickley. The cabbage will change from bright green to gold. It should never smell rancid or rotted. If you notice at any point that it just doesn’t look or smell right, use common sense: toss it and start over. It’s possible your jars or weights may not have been clean enough or the environment is too warm. Lacto-fermentation is a safe and easy way to preserve vegetables but if what’s happening in your jar doesn’t seem right, it’s just not.

Your kraut may be ready to your taste in as little as 3 days! Just keep an eye on it, and taste it from time to time. When it gets to the look/taste you prefer, you can tighten the lid and store it in your refrigerator, or keep it in the same cool spot to continue to ferment.

That’s all there is to it!

It’s one of my favorite go-to snacks in the middle of the day,

and it’s heaven on a hot dog. So tasty I usually don’t even want a bun. Even easier when I’ve got pretty polka-dotted lettuce right out of the garden.

I hope you enjoy fermenting and eating your own kraut as much as I do!

Here’s the printable recipe/instructions:

Super Easy Mason Jar Sauerkraut

Print Recipe
Prep Time 15 mins

Equipment

  • Sharp knife
  • Mason jar with lid
  • Fermentation weight (see notes)

Ingredients
  

  • 1 small/medium head green cabbage
  • 1 to 1-1/2 tbsp salt
  • 1 tbsp caraway seeds (optional)

Instructions
 

  • Wash cabbage well and peel off any soft or limp leaves from the outer layers as well as any damaged spots. Halve or quarter the head and remove the tough inner core. Thinly slice section by section and place in a large bowl.
  • Sprinkle salt over the cabbage and start to massage and squeeze it with your hands (I like wearing surgical gloves for this kind of thing). In 5-10 minutes, the cabbage turns from crispy-crunchy-coleslaw to juicy-translucent-kraut.
  • Add your caraway seeds or other seasonings/extras now, and continue to mix it up completely, continuing to massage it a bit more.
  • Scoop it into your jar (or jars) with a measuring cup or large spoon, pressing it down as you go. Leave about 1/2 inch or more head-room at the top of the jar.
  • Add your weight(s) and press down firmly, making sure the cabbage is all below the surface of the liquid. The cabbage wants to float (!) but it’s important that it stay covered to avoid mold and ensure proper fermentation.
  • Cover the jar (not too tightly, as gases will release during the fermentation process).
  • Place your jar in a cool, dark location, on a plate or tray with a paper towel on it, to catch any possible liquid that seeps out when it bubbles and ferments.
  • Your kraut may be ready to your taste in as little as 3 days,depending on the temperature and the size of your jar(s).  Just keep an eye on it, and taste it from time to time. When it gets to the look/taste you prefer, you can tighten the lid and store it in your refrigerator, or keep it in the same cool spot to continue to ferment.

Notes

This can be done in one large jar or a few smaller ones, depending on what you have on hand.
Always start with super clean containers and supplies. It's a good idea to sterilize your jars and weights like you do when canning.
You can weigh down the cabbage in your jar with glass fermentation weights, a clean nonporous food-safe paperweight, or a smaller jar filled with marbles or clean pebbles. If you use a smaller jar, you can cover your big jar with a cheesecloth or clean tea towel secured with a rubber band. You may need to change out the cloth covering during fermentation if it gets damp, to avoid mold.
Check your jar(s) every couple days for leakage or any mold on the surface (this doesn’t happen often, but if it does, don’t be alarmed: just wipe it off and let it keep doing its thing). Don’t be scared of bubbles or fizzing, this is the beneficial bacteria doing what they do! Wipe off the outside of the jar and change out the paper towel if it does get wet, to avoid odd smells or mold.
Keyword canning and preserving

The Grotto

The Grotto

October 9, 2020 Beth Comments 0 Comment

One of my favorite spots on the property has become this happy little corner of the back yard we created this summer.

Day or night this is an awesome spot to sit and enjoy a lovely beverage or a snack, or just stop and breathe for a moment.

It started as just another sunny spot in this new space, home to a falling-apart old rabbit hutch.

Our first spring we brought home a couple little grape plants from the Spring Fair at our local grange and decided this would be the perfect corner to start a little arbor.

 JD had been clearing overgrown brush and dragging cool-shaped dead branches out of the weeds that we were saving from the burn pile because they were just too cool to waste. He lashed together a natural little arch and I loved it.

We get quite a wind through here so he installed the main “posts” in concrete, like fence posts. We didn’t get any grapes yet, but the plants seemed ok with the setup.

The second spring we came home from the Spring Fair with 2 more little grape plants and a plan to expand and reinforce the arbor with a second set of posts. We had been focused on building the vegetable garden all spring and had been creating support structures with more found branches and JD just kept finding more awesome pieces to work with. Although I thought the original arbor structure was amazing, he had been looking at it all year critiquing it with his perfectionist engineer eye, and was enthusiastic to improve on its design and stability.

2 more posts were installed in concrete, additional arch and support branches were wired together, and the new grapes got planted in their new home. After the structure was in place, we realized what a nice little spot it was.

I trimmed back some of the weeds and set my old garden bench back in there. The ground was lumpy, rocky and full of snowberry roots and weeds but it was kind of nice.

That year, we got tiny baby grapes on 2 of the plants but critters got to them before we did. Still, the plants seemed to be doing pretty well. I used a lot of the leaves when I canned pickles: the tannin in grape leaves helps the pickles stay crisp.

This last spring  JD would disappear outside for hours: when I’d go looking for him, I’d find him dragging more and more cool shaped branches out of the brush, adding to his creation. He was determined to create shade in our little nest and was adding branches thick with usnea for even more protection from the sun. The whole thing started reminding me of Carol’s creations in Where the Wild Things Are (the movie). He’d lay out smaller, more flexible branches from thinned brush for me to “do my magic” with: braiding and wiring them in between the larger branches in swirly shapes.

The structure was solid but now it was time to focus on the inside.

We had some large, super-heavy concrete sample pieces we’d picked up for free from a local contractor that I’d been saving for another project but decided they’d be exactly what we needed for a flat, solid base for any seating or tables we’d want in there. While I spent hours on my hands and knees with a pick and shovel clearing out roots and rocks, JD was out back prying rocks from the back of the property and hauling them closer for me to build up the areas around it (fun fact, the “ridge” behind our house had been built up as railroad ballast so the whole thing is just…rocks. Big rocks, small rocks, crushed rocks. Lots. Of. Rocks).

We laid down landscaping/barrier fabric, crushed rock, and sifted/clean(ish) soil and set the pavers and stones in place. I built up a little terrace at the back and we planted ferns from our woods and laid crushed rock for a path along the back. I couldn’t wait to get my bits of mosses and Corsican mint planted between the pavers so that stuff went in next.

This was when the space named itself: The Grotto! Ferns and rocks always add a bit of magic to a space for me: I’m so grateful to live somewhere with so much of both all around me.

Once that was in place, it seemed like the little hill toward the dog-path behind it needed a couple stairs, so JD headed back out to the ridge for some flat rocks to use as stairs and I worked them into place. Then it seemed like we needed some smaller pavers heading toward those stairs to go with the larger salvaged concrete ones and decided to build them in place: we laid out wood scraps with duct tape at the corners in the shapes we wanted, and poured concrete to the height of the other pavers. I gently pressed pretty little rocks from my collection into the surface while the concrete was still wet.

While we waited for that to dry, I got back on my hands and knees with my pick and carved out paths on the hill behind it: using the trails where the dogs run as my guide, terracing as necessary with rocks JD had been hauling from the ridge. I finally started pulling some of my old rusty treasures out of the barn that I’d saved from my grandparents’ property. They had lived on a steep hillside with terraces and paths carved throughout the woods; I miss that place dearly and I’ve always wanted to create my own version. This is just a start.

I’m so happy with what we created so far.

I can’t say it’s finished because this stuff is always a work in progress.

As I unpack my buckets of rusty goodies from the barn, stuff gets added here and there.

Making this property into our own space is a lot of work but it makes me smile. This spot has been fun to share with our few-and-far-between socially-distanced outdoor visitors this summer…I kind of wish you could just join me there right now.  🙂

As for the grapes: well, that can be the focus for this space next year! The plants seem healthy enough, I’m just going to have to do a little research on how to keep them happy. I’ll keep you posted!

Uncomplicating, One Day at a Time.

Uncomplicating, One Day at a Time.

August 5, 2020 Beth Comments 0 Comment

I’ve been off to a slow start here with the new blog.

You know, because life. All the things, like everyone deals with all the time. Navigating, juggling.

I’ve got a pile of ideas for posts covering practical creative stuff I think people will find inspiring. But this is also about me being real. About my mistakes and challenges and the hope maybe my experiences spark something for someone else trying to uncomplicate their own life.

I’ve joked (ok maybe just with myself) that with what’s been going on I should have named this blog “Complicate.” With a 93 year old mother with dementia living in Memory Care during Covid where family has no in-person contact: concerns over her well-being as she ages and fails more quickly from this, the strong possibility of becoming a primary caregiver in her final days and navigating hospice and in-home nursing care, all really weird and foreign adulting issues for my little brain. Attempting to help another person I care about get away from an abusive, destructive situation. Reinventing my waning morphing and changing art business. Flourishing summer crops need attention today or they’ll go to waste, others require extra attention just to stay alive, weeds on the property keep growing (like weeds). The pets just keep pooping and it’s not going to scoop itself. Right? All the things. The world keeps turning and stuff keeps happening. Big important stuff, tiny dumb stuff, all of it.

We all have our versions of this, right? Faced with varying levels of hardship and concerns, it just keeps coming at us all the time. You’ve got families, kids, jobs, lack of jobs, worries: what’s happening with school, church, sports, birthdays, weddings, all the things that filled your life before. Beloved local small businesses are dropping like flies. People are grouchy about having sweaty faces under their masks. Conspiracy theories are thriving. Everyone is mad at “the other side”. Everyone just that much more on-edge about each little situation, the general vibe of unrest hangs over us like a thick fog. In that fog we have this tendency to hang onto worry and fear over everything else.

Days go by so fast; seems like way faster than they did before. I mean, life does that anyway as we get older, right? But in this new and different semi-quarantine/whatever-it-is world, time is different, schedules are wonky. I’ve been taking breaks from social media for my mental health, but then lose track of the time that goes by during those breaks.  I start each day with an intended schedule and list of goals, but then the day is over and I let stuff slide: oops, time’s up, I guess I’ll just do yoga tomorrow (then I wonder why my bones are so crackly and I feel tired the next day). Stuff on my to-do list gets pushed one more day, over and over again. Maybe I should have been more realistic when planning those blocks of time in the first place, or: maybe I shouldn’t have gotten sidetracked with that one project, or: yeah but my slow internet made that task take way longer than it should have…. You know, it’s always something.

But it’s ok. The important part for me is to not beat myself up about it. Keep facing forward. Every day, every moment, gives us the opportunity to reboot, refresh, start over, move on, all of it. What complicates a lot of us is our habit of worrying about the past. Why did it happen that way, or: but that one thing held me back, or: I should have done that differently…

Seriously none of that matters in this moment and all the moments to follow.

Today is the best day ever because it gives me the opportunity to move forward and work toward all my dreams. My past is just a bunch of lessons I’ve learned and stuff I now have the opportunity to build on, and today I’m grateful for every one of those things.

Today I wish you all the peace and confidence and mostly gratitude to face forward and do the best you can. Because, that’s enough.

Roasted and Smoked Tomato Goodness

Roasted and Smoked Tomato Goodness

July 10, 2020 Beth Comments 2 comments

After my late start this spring I’m still just in the dreaming-of-the-future stage with this year’s tomato harvest. They’re coming along nicely but it will be a while before I get that magical taste of late-summer I look forward to the rest of the year.

As I mentioned before, my old gardening habits from my small, shady city backyard don’t exactly fly here in my sunny country garden. In my old garden, I pretty much only ever had enough tomatoes to eat the day I harvested them. An already short season here in the Pacific Northwest is even shorter in the partial shade, so I had given up on growing larger varieties and focused on cherry and grape tomatoes that I could pop in my mouth and enjoy as they ripened, or throw in a fresh pasta dish that same evening.

Fast-forward to my first country garden: I planted as I always had before, and ended up with out of control cherry tomato vines with way more than we could eat fresh. I only grew 1 variety of larger tomatoes (gorgeous and tasty “Orange You Glad“) and had way more than we could eat of those, too. My answer to preserving much of this goodness was roasting and smoking them for sauce.

If you haven’t roasted tomatoes before you’re in for a treat. It’s been my go-to solution for years to use up those pale, flavorless off-season grocery store tomatoes (I’ve always called them “cardboard tomatoes”, you know the ones). Cut those icky old things up into chunks and stick them in the oven with a little olive oil, sprinkled with some salt, pepper, herbs and maybe a couple splashes of balsamic vinegar: you end up with sweet, caramelized tomatoey goodness.

Hit that with an immersion blender or throw it in the food processor and you’ve got a killer rich sauce for pasta, you don’t even need to peel the tomatoes first. Our favorite is to toss the puree with roasted spaghetti squash and top with generous amounts of Parmesan and cracked black pepper.

Roasting is awesome, but I’ve become even more obsessed the last couple years with smoking fruit in our little electric smoker, and tomatoes are excellent smoked. I like to use the smoked puree as an ingredient in soups and sauces more than a stand-alone sauce, as it can be pretty strong on its own.

Last summer I would roast and/or smoke a batch or two of tomatoes every few days and usually just freeze quart bags of them as I went. By September the kitchen counter was always full of tomatoes.

We ate a lot, I froze some, canned some, but mainly stuck with freezing the roasted sauce as I didn’t have an accurate feel for acidity (as in, canning safety) for each different roasted batch.

By the end of October we were overrun with green tomatoes that needed to be used right away.

I tried making some smoked green tomato salsa that wasn’t as exciting as I’d hoped (will be experimenting and tweaking that recipe this year and will keep you posted). The salsa was sort of meh on its own, but it and the roasted and smoked green puree has been an excellent addition to soups, chili, and other sauces this past year.

If you’ve got a little freezer space, or just want to try some roasted or smoked sauce now, it’s a simple way to enjoy your harvest, or even those icky cardboard grocery-store tomatoes if that’s what you’ve got!

Roasted or Smoked Tomato Sauce:

Scroll down for printable instructions/recipe!

Cut any variety/shape of tomato in medium/large fairly uniform size chunks (no need to peel them!). Size isn’t that important as long as they’re all around the same size so they cook up the same. I like to halve cherry tomatoes for this so they release the juices but it’s not necessary. Place in a single layer cut-side up in a deep baking sheet lined with parchment. The tomatoes may release quite a bit of liquid while cooking so it’s important to do this in a pan with edges so it doesn’t run all over your oven.

Toss a little olive oil, salt and pepper, and whatever herbs you prefer (I usually use basil and oregano, fresh from the garden or dried).

For roasted tomatoes: Roast in a 400 degree oven until their released juices get bubbly and caramelized and they just start to darken up. Depending on the size of your chunks and the moisture content, this is usually 20-50 minutes. Some tomatoes will appear very dry through this process, others get really juicy as they cook. These were all “eating tomatoes” rather than paste/sauce tomatoes but still the liquid content varied quite a bit.

For smoked tomatoes: I’ve only smoked tomatoes in a small electric smoker so I suggest you use the basic guidelines in your smoker’s manual (or previous smoking experience!) for the perfect smoked tomatoes. I prepare the tomatoes the same as for roasting and use a small pie pan or piece of foil lined with parchment to contain the released juices.


I’ve used alder and mesquite chips for tomatoes but still can’t decide which we like best! I’ve had the best success smoking them at a medium-high temperature (275-300) until they bubble and caramelize a bit. This won’t happen as dramatically as higher-heat roasting and a little more juice will still be present when they’re cooked.

If you’re going to eat the sauce right away, transfer the warm tomatoes to a heatproof bowl and puree with an immersion blender, or place in a food processor and pulse until smooth. Toss with your favorite pasta and top with cheese for a simple and delicious dinner.

If you’ll be saving the sauce for later, it’s all much easier to handle if you let the roasted tomatoes cool before pureeing/processing. Refrigerate the pureed sauce for up to a week, or after it’s completely cool you can fill freezer bags to enjoy the flavors of summer the rest of the year.

Roasted or Smoked Tomato Sauce

Print Recipe
Prep Time 10 mins
Cook Time 1 hr
Course Main Course, Side Dish

Equipment

  • oven or smoker

Ingredients
  

  • Fresh Tomatoes - cut into uniform chunks
  • Olive Oil
  • Salt and Pepper - to taste
  • Fresh or Dried Herbs - optional

Instructions
 

  • Cut any variety/shape of tomato in medium/large fairly uniform size chunks (no need to peel them!). Size isn't that important as long as they're all around the same size so they cook up the same. I like to halve cherry tomatoes for this so they release the juices but it's not necessary. Place in a single layer cut-side up in a deep baking sheet lined with parchment. The tomatoes may release quite a bit of liquid while cooking so it's important to do this in a pan with edges so it doesn't run all over your oven.
  • Toss a little olive oil, salt and pepper, and whatever herbs you prefer (I usually use basil and oregano, fresh from the garden or dried).
  • For roasted tomatoes: Roast in a 400 degree oven until their released juices get bubbly and caramelized and they just start to darken up. Depending on the size of your chunks and the moisture content, this is usually 20-50 minutes. Some tomatoes will appear very dry through this process, others get really juicy as they cook. These were all "eating tomatoes" rather than paste/sauce tomatoes but still the liquid content varied quite a bit.
    For smoked tomatoes: I've only smoked tomatoes in a small electric smoker so I suggest you use the basic guidelines in your smoker's manual (or previous smoking experience!) for the perfect smoked tomatoes. I prepare the tomatoes the same as for roasting and use a small pie pan or piece of foil lined with parchment to contain the released juices.
    I've used alder and mesquite chips for tomatoes but still can't decide which we like best! I've had the best success smoking them at a medium-high temperature (275-300) until they bubble and caramelize a bit. This won't happen as dramatically as higher-heat roasting and a little more juice will still be present when they're cooked.
  • If you're going to eat the sauce right away, transfer the warm tomatoes to a heatproof bowl and puree with an immersion blender, or place in a food processor and pulse until smooth. Toss with your favorite pasta and top with cheese for a simple and delicious dinner.
    If you'll be saving the sauce for later, it's all much easier to handle if you let the roasted tomatoes cool before pureeing/processing. Refrigerate the pureed sauce for up to a week, or after it's completely cool you can fill freezer bags to enjoy the flavors of summer the rest of the year.
Keyword canning and preserving, quick dinner, tomato sauce

Posts navigation

OLDER POSTS

Categories

Tags

average frost dates buying seeds canning and freezing change cold frames covid life DIY edible gardening extending the growing season fermented foods ferns freezing tomatoes fruit trees garden advice gardening garden paths garden planning garden structures growing tomatoes hardscaping inspiration kitchen garden mini greenhouse native gardening native plants nature organic gardening organization pandemic life pest control planting seeds planting the garden quarantine life raised bed garden real life roasted tomatoes sauerkraut sketchbook smoked tomatoes sustainable living tomatoes tomato recipe tomato sauce vegetable garden wildlife

bethlogansart

bethlogansart
True story. 🤎 Actually it’s been a minute si True story. 
🤎
Actually it’s been a minute since I took a walk back into the woods NOT somehow related to spring chores…but on the other hand, some of my spring chores require me to be in the woods so how awesome is that, right?
🤎
Also I keep getting busy with those chores (!) and forgetting to post drawings I already did for the #coloritree creative challenge with @estemacleod and @lorisiebert.studio 🌳 swipe to see the colors and amazing inspiration art for this one 💚
Here’s to the woods, my friends…let’s all take time to lose ourselves in the magic of nature and find our souls…who’s with me?
🤎
Happy Spring, friends!
🌼 🌱 ✨ 🌸 ✨ 🌱 🌼 #becausespring # 🌼
🌱
✨
🌸
✨
🌱
🌼
#becausespring 
#equinox 
#springequinox 
#ostara 
#bunnies 
#dancingbunnies 
#itsspring 
#yay 
#freshstart 
#newbeginning 
#happyday 
#happybunnies 
#cutebunnies 
#happyart 
#surfacedesign 
#bethlogansart
It’s happening 😍 such a hopeful tone of year, It’s happening 😍 such a hopeful tone of year, right? 🌱💕🌱✨🌱
Also this. 💚 Totally forgot that I drew this l Also this. 
💚
Totally forgot that I drew this last week for the #coloritree creative challenge with @estemacleod and @lorisiebert.studio 💜💚 this is what’s been on my mind, but I guess I’m a little awkwardly scattered here in the midst of this seasonal transition thing…spring is trying to burst wide open all over the place but it’s hard to fall in-line with that when it’s so fricking cold every time I go out to do chores 😆 gah! 
💜
Are you ready for spring? Any second now…right?
.
.
.
.
.
.
.
#springiscoming #toeverythingthereisaseason #seasonschange #coloricombo #limitedpalettechallenge #creativechallenge #handlettering #fourseasonsart #treeillustration #treeart #ilovetrees #draweveryday #surfacedesign #bethlogansart
True story…in case you needed the reminder today True story…in case you needed the reminder today. 
✨🖤✨
Also, today is the birthday of one of my favorite humans on the face of the earth and this pretty much sums up how we feel about her…
✨🖤✨
Also, this. Just sayin. ✨💕✨ Mugs are avai Also, this. 
Just sayin. 
✨💕✨
Mugs are available in TheArtstuffStudio shop now! Link in Insta profile or click “ShopLinks” on my Facebook page. 
✨💕✨
Have a drama-free day my friends!
Good morning. How’s your week going so far? ✨ Good morning. How’s your week going so far? 
✨
It’s pretending to be spring around here. Snowdrops and crocus and all the chirping birds and all the little green weeds are basking in the (cold) sunshine ☀️🌱❄️ so much to do…. 
Enjoy your day, friends!
.
.
.
.
.
.
.
#mybackyard #herecomesthesun #springiscoming #thismoment #uncomplicate #justbreathe #slowliving
Who’s with me? Ready…set…go. 💙 Morning d Who’s with me?
Ready…set…go. 
💙
Morning drawing with another cool palette and gorgeous inspiration art (swipe to see) for the #coloritree challenge with @estemacleod and @lorisiebert.studio 
🧡
Pretty soon it will be getting light out early enough I’ll be shifting my daily schedule: my dark morning drawing time will be replaced by garden-chores-before-the-sun-hits time, and the rest of my schedule will morph around that. 
Still getting used to accepting and flowing with Nature’s seasonal shifts in my daily life and work. Funny how something so organic and anciently-instinctual gets completely wiped away by modern life, as we’ve conditioned ourselves to exist and accomplish on made-up timelines. I know there’s a way to honor the seasonal shifts while staying present with the practical and creative responsibilities of my business but most days I’m still working that shit out…going back and forth between fighting the to-do list with trying to stay open and accepting to every clue and lesson. And like a friend and I were talking about last week: when you are open to those signs, funny how EVERYTHING around you suddenly becomes a sign 🤣 right?
💙
So yeah…here we go: what are you opening yourself up to today?
Morning snack time 🌱 weeds are already starting Morning snack time 🌱 weeds are already starting to pop up in the garden beds so the girls are getting morning snack trays of mostly grass, sheep sorrel, daisies and a few baby dandelion. This morning was kind of subdued but it can get hilarious with them tossing stuff in the air and squawking at it 🤣 we are still getting used to each other but so far everyone seems pretty happy 💕🥚
Load More... Instagram

What I’m Reading:

© 2023   All Rights Reserved.